Sunday, December 4, 2011

Construction Status (Final structural concrete pour, in search of reclaimed wood, interior partitions and roof framing, SIPS, windows, rough elect and plumbing, exterior trim, drainage, final grading and hardscape)


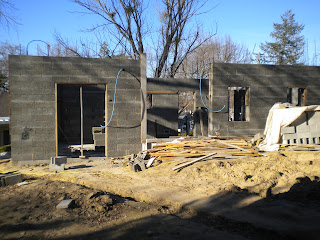
It’s been a long project as I knew it would be but still longer than I expected. Much of the time since the last update there was little to report or photograph. Recently there has been more activity and there is a lot to write about since May. I’ll be fairly brief in the interest of updating to the current state and perhaps go into more depth sometime later if there is interest. Below are some current photos. I will describe the activities that lead up to this point.


Lumber package – Looking back at our original goals regarding wood, here is what we said:

“use wood sparingly - reclaimed or ‘sustainable’ harvested product”

The house, by design, uses substantially less wood than a wood framed house and we only expect a minimal to modest amount of wood interior trim. I think we are doing a good job of using wood sparingly and I’d give us a “B” grade in that department. I consider the use of wood fair criticism on this house, but I take stock in using it somewhat sparingly.

I spent considerable time searching for reclaimed wood beams for the trellises, ridge beams, and other large structural/architectural beams. The sizes of beams range from 4x4’s to 6x14’s, and 3’ to 25’ in length. To try and find and compile these beams from several small sources would take many months if not years to complete, so I looked for a single supplier or clearing house. That supplier was Crossroads Lumber near Shaver Lake. After perusing their website, I arranged a visit to check out the goods. Crossroads has a large inventory of just about every size of beam, mostly in old growth douglas fir, and they can mill down to what they don’t have as well as prepare various surface finishes. I left pretty excited at the prospect of using some of those beams in the house, but the cost ended up being too high to justify. Reclaimed beams of the quality Crossroads sells cost about $3.50/bf with a wire brush finish. Good quality new wood (S4S) costs about $2.50/bf for the large beams and almost half that for the smaller sizes. The pricing is much better on the large reclaimed beams than on the smaller ones, which seams counter intuitive.

The ridge beams and corbels went in first followed by the upper porch posts and beams.


The Structural Insulated Panels (SIPS) were delayed due to a vendor who was unable to perform. When we made the difficult decision to abandon that effort and work with Premier Building Systems, we had a design in a week and SIPS on the job 10 days later. The SIPS panels were relatively easy to lift and slide into position, glue and nail before final attachment with screws on 6” centers into the sill plate. A crane would have been more convenient, but expensive and unnecessary. This was a remarkably smooth process once we connected with Premier.


The interior partition walls and dropped-ceiling were conventionally framed. The walls with doors were generally framed with 2x6 studs to better match the thick (Faswall) exterior door and window inset detail. These walls will be rocked and plastered to match the other walls. Windows were flashed and screwed to window bucks as shown. So far, we are very happy with the Windsor windows.

The exterior siding is constructed from a select Doug Fir “resawn” plywood with 2 ½” x 1” bats. This is a more substantial bat than I’ve seen on most homes and believe it gives a better look with our large columns and beams. The bats are attached with ring-shanks in a staggered pattern.

Much of the waste pipe and traps were plumbed early on and embedded in concrete. The remaining vents and drains are installed in the wood walls and engineered floor joists. The same is true for the electrical wiring. We have chosen to plumb the hot and cold water with PEX tubing rather than copper. More on that later.

Outside, swales were shaped and drain lines installed to the curb and to the cistern. Rather than installing several “first flush” bypass valves at the downspouts, we plan to install a bypass valve just before the tank inlet, therefore bypassing the tank manually when desired. We also plan to use chains rather the pipes for the downspouts, so this seemed to be an effective and economical first-flush solution.


Finally, we got a little ahead of ourselves and put in some landscape walls. These walls and borders were built 100% from bricks recovered from the old driveway, BBQ and planter boarders. The clinkers are very cool!


Friday, May 13, 2011

Construction status (Rain, concrete, steel, sunshine, beams, joists, more rain, subfloor, window delivery, interior framing and more Faswall block!)

With the wet weather much of February and March, not a lot a lot of progress until the end of March. Now, the structure is near to being ready for the installation of the Structural Insulated Panel (SIP) roof.


I even installed a few courses of Faswall block with my daughter and found it to be straight forward and relatively easy to do well.


Recapping the progress over the past few months…..

The joist hanger system shown here is a Simpson plate that inserts through the wall of the Faswall block and becomes imbedded in the concrete anchor.


Simpson ledger plates

The ledger is then sandwiched between the hanger hardware and the plate with thread cutting screws (see photo below). The bolts shown above the plates are to attach the subfloor diaphragm to the steel reinforced concrete walls. The bolts shown above on the CMU block wall to the left are for attaching the ledger on that wall.  Although the Simpson plates are a solid solution, they are a bit more complicated and costly to install than L bolts.


Pleasanton Steel came a few times in between rain events to install beam brackets, I-beams headers over the versolarium glass doors and impressive C-channel for the bridge over the entry.  All of the structural steel is in except for two matching I-beam headers over the upper entry foyer windows.


welding beam saddle, joist hangers and "BigBeam"

 
C-channel supporting upstairs bridge
The Windsor Pinnacle windows and doors arrived on Friday, March 25, and I went to go look at them on following Monday. We selected Windsor windows as a more cost effective alternative to Loewen Windows during the pre-construction phase. We also looked at Pella, Marvin, and Millguard. I don’t recall anything about Millguard and it is possible that I actually didn’t consider them very closely (for whatever reason or no reason). From my research and inspection, the Windsor windows appeared equal or better than the others and use the same Cardinal glass. Windsor Pinnacle with alder interior and metal clad exterior were selected. Alder was preferred over douglas fir and pine as a harder wood and character desired for other woodwork in the house.

Although the windows and doors in general looked excellent, some irregularities in the quality of the alder millwork were noticed. We immediately brought it to the attention of Windsor and they were quick to take responsibility for the defects and we are awaiting replacement of a few windows.  In general, though, this windows and frech doors look excellent.

Exterior folding-sliding doors (accordion) from a quality door company like Loewen or Quantum (originally spec'd) cost approximately $1K/lf installed. This was beyond our budget and so we considered a less expensive solution with just two sliding panels and the rest fixed from Windsor. This system is a little less than half the cost and so we made the design compromise. There will still be a folding sliding set (5X 3’x8’) on the interior and plan to purchase door panels separately and install the sliding hardware ourselves.

The downstairs interior framing is substantially complete.  Shown here is the master bedroom wing nearly ready for SIP's to be dropped in.  This portion of the house is purposely at an obtuse angle to face south and carry solar hot water panels.  The small attic space for storate is over the bathroom.

Monday, February 7, 2011

Construction status (more walls)

There's not much more to add at this point but photos of the walls.  They continue to get taller and are still straight as can be!  The second pour is a couple of days out.


Nacho lifting block over rebar

bending steel to allign with blocks.  This
is a junction of Faswall to CMU block
wall from basement


Ponch on entry wall
bedroom wing
(single story)
living room and bedroom wing from backyard
walls are at about 10ft

Sunday, January 16, 2011

Construction status (Faswall walls, electrical)

Faswall blocks arrived!
Blocks are 85% wood chips (ground up old pallets)
and 15% portland cement and fly ash

The orginal plans were developed with Durisol ICF blocks, available in multiple widths. The first floor used 12" and the second floor stepped down to 10" with the relief showing on the exterior at the transition from plaster to board and batten siding.  This stepped appearance was an architectural feature I was not eager to to ignore when the wall contractor began seriously proposing a change from Durisol to Faswall.  Faswall is only available in 12" width.

The two products are similar in composition and less so dimensionally, but still generally compatible products.  Faswall is 8" tall where Durisol is 12".  Horizontal steal is placed at 16" intervals with Faswall (every other course) and at 12" minimum intervals with Durisol.  This meant the structural engineer needed to do some work to establish a revised steal schedule.  Further, I needed to be convinced that the 12" block all the way up would have an acceptable appearance at the transition from plaster to board and batten. Some mock-ups were built and, while I believe the stepped transition would look better, the benefits in switching to Faswall had a greater influence on the decision to make the change.  The primary benefits are that Faswall (by Shelterworks) were far more forthcoming with information and technical support, and the manufacturing plant is located in Philomath Oregon (575mi) vs. Ontario Canada (2,600mi).  Everywhere else where <12" wide blocks were defined, the appropriate CMU block was used instead.


Corner window showing mineral wool
insulation and excellent fit!


View from office looking at house to the NW
I've been very pleased so far with the ease of assembly and cutting blocks to form a straight and true wall.  The workers, who are skilled in carpentry and to a lesser extend masonry, seem to work with the new construction method with ease.  Even the electrician, who is more accustomed to rolling in on the job after the wood framed walls are up and running wire and attaching junction boxes most anywhere, is positive about working in the somewhat more constrained environment.  With only a couple of minor exceptions which can be repaired such that we'll never know the difference, the electrical boxes have been installed very cleanly and tight in the Faswall blocks. Of course, we do not have the luxury of no/poor planning with regard to the locations of electrical outlets and switches that we would have had with wood framing.  We have to get it very close to right out of the gate which doesn't seem to be a very difficult.  If we find we want to add or move something after the concrete is poured, we have somewhat limited ability in routing new wires or we'll just have to live with it.  Afterall, keeping things simple is part of what we are trying to acheive in our lifestyle goals and fewer recepticals/switches means less material and waste.


Kitchen wall with electrical boxes
It looks like we are about a week away from pouring the first lift of concrete in the walls.  The wall contractor does not anticipate using any bracing and intends to rely on the glue, a few deck screws that are holding the blocks in position, and careful management of the concrete pump/hose to yeild straight walls.


Construction status (slabs, cistern)


Pandeck over basement
October through December were full of form building, in-slab plumbing and electrical, steel (rebar, red iron, pandeck), grading, underground cistern, and a few rain delays.  The Fawall block walls starting going in today (1/3/11) so I have some things to catch up on before reporting on the external wall phase.
My favorite part of the project thus far has been the design and construction of the storm water cistern. During the design phase, rain water storage kept getting put off until finally laid to rest as a rectangular shaped dotted line on the landscape plan. Since this was an essential component of our sustainability objectives and had to be built early in construction, I researched various storage methods including material and construction costs with the following requirements:
  • 5000 gal minimum
  • Underground
  • Pump suitable for drip/micro irrigation (minimum 10 gpm @ 20psi)
  • $5000 budget ($1/gal)
I found several suppliers of plastic underground tanks maxing out at 2500 gal and larger fiberglass tanks. These were the most intriguing underground plastic tanks:
Fiberglass tanks in 5000 gal size cost approximately $7000 and the 2500 plastic tanks are in the range of $2300-3500 each plus shipping ($671 for two Norwesco tanks). We also looked into precast concrete vaults which cost around $8000. The Norwesco tank appeared to be the most economical "off the shelf" solution at $2300 per tank. Other costs to consider for water storage are excavation, backfill and piping between tanks if needed.

My contractor convinced me he could build a concrete tank for less than the cost of the plastic tanks. The plastic tanks have limitations in how deep they can or must be buried and their dimensions may not work efficiently in the space available.

Purely looking at cost per gal of the storage container (w/o shipping), it breaks down approximately like this:
  • Norwesco 2500 gal - $1/gal
  • Double Torus 2500 gal - $1.50/gal
  • Fiberglass 5000 gal - $1.50/gal
I was preparing to order Norwesco tanks when my contractor suggested building a steel reinforced concrete cistern. The idea was to build a tank using 4'x8' plywood forms on the inside and earth as the outside form. This also meant the tank could be any rectilinear shape desired, a big plus in our situation due to space constraints.  The area we were considering for the tank lies between the garage and root zone of a large Valley Oak tree. We decided to construct the tank in an "L" shape around the end of the garage and about 6" to 18" underground. This will conform around the garage and not encroach on the root zone or very far into the backyard planting area. The finished inside tank dimensions worked out to be 8'W x 4'H x 14'L on each leg of the "L" or effectively 8x4x36=1152cf=8,559gal.


Add a fiberglass 24" manway for $300 delivered from (www.frpsupply.com), PVC sleeves for the inlet and outlet and you have a nice sturdy underground water storage solution. The 2x4 and plywood forms were removed 10 days later through this manway.  I will report on the total cost breakdown once all of the numbers are in. So far, it is not looking as good as originally expected but likely still lower $/gal and more efficient site utilization.


Rain can be collected at a theoretical maximum rate of 620gal per 1000sf of horizontal roof per inch of rain. However, there are losses in the collection process (splashing, leaks, filtration losses) so I will derate by 20%.

An appropriate pump for this application is a "Shallow well jet pump" which consists of a jet pump and a pressure tank. This type of pump is capable of lifting water 0-25 ft and filling a pressure tank. Water is "demanded" from the pressure tank for use and refilled by the pump as required. Pumps and tanks for our specifications run about $300-$400. I will likely go with a packaged pump/tank system like a Sears Craftsman Professional 1/2 hp Shallow Well Pre-Plumbed System (8 gmp @ 40 psi).

The  roof collection area is approximately 1500-2000sf. Water will flow into rain gutters, through downspouts and exhaust in two or more vessels. The vessels are intended to be both decorative and functional as sand filters. Pipes under the vessels will carry the water through another secondary filter(s) and into the cistern. There are a few items yet to consider including venting, biological water treatment, overflow and water level monitoring.

At the time the top of the cistern was poured, the remaining sub slabs of the house and remaining CMU block walls were also being poured. The finish slabs which contain the plastic PEX tubing and form the finished floor will be poured much later in the project after the heavy construction traffic subsides.

Justin vibrating CMU wall


living room slab pour / entry coat closet opening


Around the slabs the plans called for 2in of rigid foam insulation. The contractor and city inspector were uncomfortable with the slab not tying into the foundation perimeter. A compromise was agreed to such that the insulation began directly above the connections of the steel anchors from the slab to the perimeter concrete. The first 7 or so inches of slab is insulated which should substantially reduce the thermal path from the topping slab (hydronic heat) to the perimeter foundation to earth.
Faswall was qualified as an alternate source for the exterior block walls (www.faswall.com) and was delivered this week. More on the Durisol to Faswall substitution in the next update….